Sunday, May 1, 2016

Setting Goals Does Work


Valspierssews

I have been doing a bit on my quilt every couple of days. I write it in on my 'To Do' list.

"Work on the quilt" is also written up on my vision board for April and I made a list of the steps I had to work through to get to the end result.

I crossed off each step on the list as I did it.

I cut out the second butterfly wing and the base of the watering can and fused them onto 7 blocks.


So far over the last week or two I have gone from a nearly blank block to a nearly fused block.
All I have to do now is the leaves and the bees. I will make a good start on that today.


My April goal was just to cut out more applique. I wasn't too specific because I didn't want to set myself up for failure.

When I broke down the job into small steps I included the last step of fusing it onto the block and I was determined to "cut out more applique" for all 7 blocks.


Next month I want to start doing the echo quilting on these blocks. Then there are 8 more blocks to finish.

Happy Quilting,
Val

Wednesday, April 20, 2016

Making some progress each day now.


I have been putting my Go Wild garden quilt on my to do list each day and it is incredible how easy it is to do a bit each day. I have fused on the flower, the bird and the watering can top and heart for 7 more blocks.


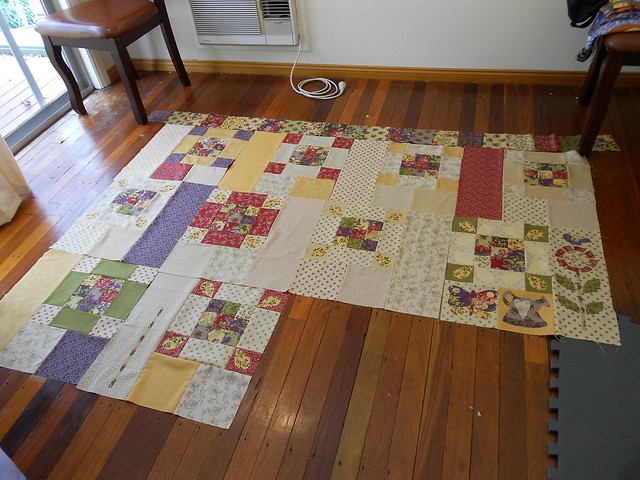
This is what it looks like finished. So still a bit to go.


Today, however I wanted to cut out some different elements and be blowed if I could find the book anywhere. I know it is somewhere in my sewing room but the boxes are so stacked up in the cupboard that I don't have much hope of finding it anytime soon.

What did I do? I decided that maybe I would just buy another book or at least look for the templates on Pinterest or Google.

Nothing!

I then happened upon the eBook version of Country Cottage Quilting for just $13.95 USD on Amazon Kindle store. I downloaded the sample to make sure the templates were accessible and there it was.... a link to the site where the templates could be found.

I clicked right over there and found a whole bunch of books that have free templates to download. Perfect for me since I don't need the instructions anymore but I think I will explore some of the other books to get ideas.

http://ideas.stitchcraftcreate.co.uk/patterns/

I just love the internet. Now I don't have to buy the book again or even try to find it. Yay!

Happy Quilting,
Val


Saturday, April 2, 2016

Getting back to my Go Wild Garden Quilt

This quilt sure is slow going!

Hopefully not for long. I really want to get lots done this year.

I have cut out half the remaining applique elements.


I have started putting them onto the blocks. I hope to get the birds and their wings ironed on soon.


I will be appliquing each block then echo quilting each block separately. I will then stitch all the blocks together then add the backing. My version of quilt as you go. Once the backing is on I will stitch in the ditch between the blocks to hold the backing in place.

Happy Quilting,
Val

Wednesday, February 12, 2014

February Update

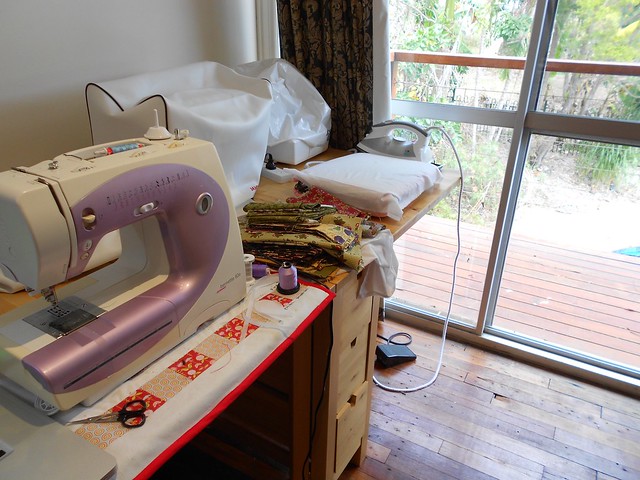
Over January I managed quite a lot before I had to pack up my machine to move house.
I finished the four pieced borders.


I got the last 4 blocks of 16 pieced.


I glued pieces on 2 more blocks.


I nearly finished stitching the first block.


Cheers,
Val

Friday, January 3, 2014

January update

On my last post I said I wanted to do a block a month. It is now January and I haven't touched it. So the new resolution for this year. Get a good start on it this month for my commitment to the Something old Something new linky party over at Never to Hot to Knit/Stitch.
I have taken some before photos and written in what I want to get finished by the end of January.

I have one fused down. I want to fuse 8 and stitch around 4
I have 4 more blocks to piece together. I want to finish these four.
I have one border sewn together. I want to get these three sewn together.
I have two sets ready to fuse to the applique fabric. I want to cut out 6 more and
use them all on the 8 blocks I want to finish.
This will only take me up to half finishing the quilt top so I will need to do a little bit each month with the aim of finishing it by the end of the year.
My quilting resolution this year is to finish at least 2 of my big UFO's. The two at the top of the list are this one and the Welcome to the North Pole one.

My new skill for this month will be to try some new stitchery using corded buttonhole stitch and   raised leaf stitch. I have a book with some really cute stitcheries and projects. I will be making one little stitchery to go on a linen pocket for my inspiration cards.


I am using this blog for the Linky Party. Be sure to visit my regular blog at Val Spiers Sews.

Cheers,
Val

Tuesday, October 22, 2013

Preparing the applique for one block


I think I will try to finish at least one block a month. I still have 6 background blocks to put together. As I worked out earlier they take 15 mins to do. So I will do a couple before doing an applique block each month.
As with all my quilts so far I will be putting the wadding on a block at a time so I can easily quilt each block.
I am going to use machine buttonhole stitch and dark purple embroidery thread to go around the applique pieces.
Since my machine with the buttonhole stitch is in for service I have just done the sticking on this month. I put together one border strip and did two background blocks.
I have piles of this fabric on my table. I want to be able to see all the fabrics to choose from for the applique. I need a big box to store this WIP.


I feel like I am making good progress.


I will need to do a bit of block juggling before I finally sew them together so the fabrics are distributed evenly. Those dark strips should be mellowed a bit when the flower goes on top.

Speeding up the applique process


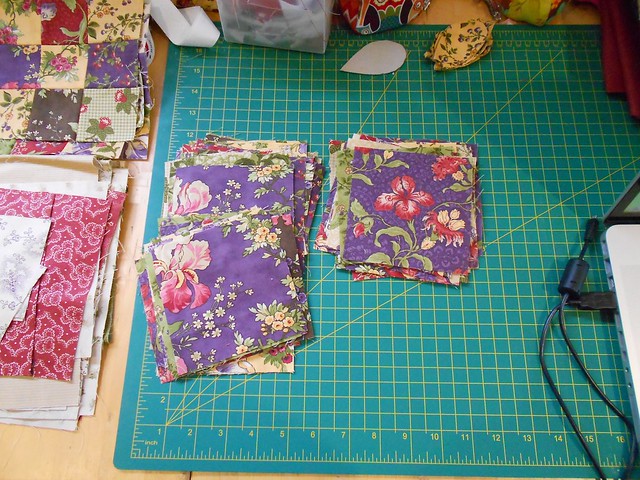
I wanted a way to speed up tracing and cutting of all the applique pieces. Hang on a minute. I better cut out all the 4 1/2 squares I need for the border before I cut up the fabric for applique pieces. It has been a while since I worked on this quilt so I was pleased to find a stack of 4 1/2 inch wide strips already cut. I must have been thinking straight when I cut the strips earlier because I ended up with 4 or 6 squares of each colour and a nice even mix of dark, medium and light fabrics.

I had sewn one side together when I took this so only 3 piles.
I sorted them into 3 piles then into the different fabrics. I wanted 21 or 24 in a pile so I just started picking up one dark, one medium, one light until I had 4 stacks for the borders. I don't like having to think too hard about keeping them in order as I sew them together so I just sew one square at a time for each side. If I tried chain piecing them I know I would get in a muddle.

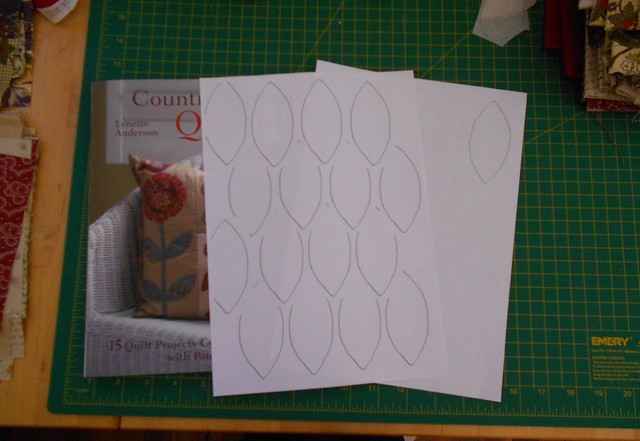
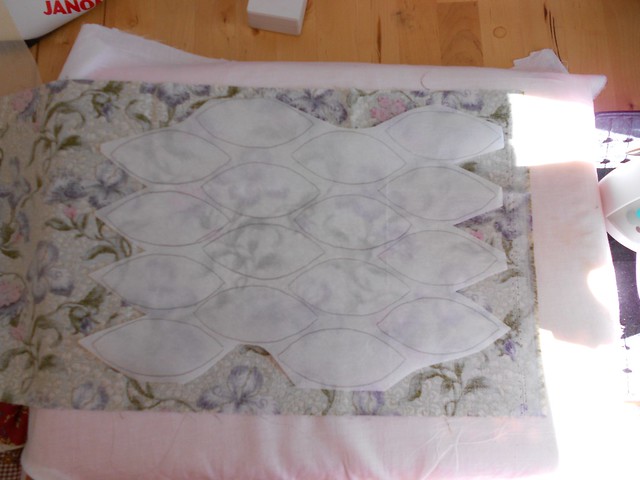
To facilitate tracing the applique pieces I fit as many as I could onto an A4 sheet. I only had two pieces left over. I then cut an A4 size piece of fusible webbing paper and traced all the pieces. I had to cut them all out so I could use them on all different fabrics.

The dotted lines are where I cut out the fusible webbing before putting it on the fabric. I keep the pieces to use one day. I figure I will prepare one set of pieces then make up one block and sew it. 8 blocks go one way and 8 block face the other way so I had to

  • scan my page as a jpg;
  • open it in Preview; 
  • flip it horizontally to reverse it;
  • file print then scale to 100%, and
  • print it out.


I need lots of leaves so

  • I traced one leaf and scanned it as a jpg. 
  • After scanning I cropped it close to the lines. 
  • I then inserted it in my word processor (Pages) and sized it to the right size using the metric inspector in Pages. 
  • I then copied and pasted it many times. 
  • I had to set the images to floating and then arranged them close together. 


The overlap hid some of the lines but it was easy to trace over the single leaf to fill in the blank spaces. I cut out the A4 piece of fusible webbing paper and traced on the leaves.


I trimmed away the excess webbing paper. I will put all 16 on one piece of fabric. The next 16 on a different piece.


It only took about 10 mins to get them ready from tracing to cut out.

If you have any questions about how I scanned or made my sheet for tracing feel free to ask me.